With the new release of Kingston V+ series and bigger capacity (256 Gb or above), why don't I choose the latest version and go for the V series? Because my laptop is almost 3 years old now, I foresee some compatibility problems with SATA III interface. V series is still using SATA II interface which I know is compatible with my mb according the spec laid out on apple.com. For those of you who own a mbp released in 2010 or later, SATA III should run just fine.
Ready to upgrade!
Front cover
Backcover
You need 00' Phillips screwdriver (yellow) + torx T6 screwdriver (husky 8-in-1 set costs ~$6@home depot) for this task
Inside the box: hard disk, a cloning CD, USB cable, hard disk case
For the late-2008 mb, you don't need to open the case to change the hard drive. Unhook a lever on the back, the hard drive sits next to the battery. Use 00' Philips screwdriver to loosen the bar which holds the hard drive in place
Next unhook the cable on the side.
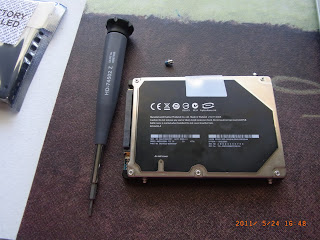
Take out the hard drive. There are 2 torx T-6 screws on each side. Use torx T-6 screwdriver to remove the screws
Put the 4 T-6 screws on the new hard drive and place it back on the hard drive slot. Connect the cable and the holding bar.
The next step is to transfer all the data from the old hard drive to the new one. I bought this Kingston upgrade kit (instead of OCZ vertex 2 hard drive) because it comes with a cloning disk. I assumed the disk can help me clone the data without the need to re-install the OS. I was wrong. The cloning disk only works on windows. After several failed trials, I realized that I need to follow the conventional way to backup (using time machine) -> verify new hard drive (disk utility, select new drive, then verify) -> reinstall snow leopard. I followed more or less the same step as shown in this youtube video, from 4:18 onwards to re-boot the computer.
Done! It took 24 second to boot the system. It's not a huge improvement because I'm still using 2Gb RAM. I will run another test once I upgrade to 4Gb RAM.


No comments:
Post a Comment